Optimizing WordPress SEO is not limited to Backlink issues and the number of articles. Improving site loading speed is an important point to improve WordPress SEO. One of them is to apply settings or how to properly WP Rocket plugin settings can make loading sites faster. This is the same as you attract visitors to open page by page on your site.
Speed up website loading with the WP Rocket plugin is the right choice to improve SEO WordPress. Although this plugin is not free, but its features make you not care about any price it offers.
WP Rocket plugin is not like other WordPress SEO plugins that have the same function. Like the W3 Total Cache plugin and WP Fastest Cache, they come with a free version. But WP Rocket isn't because they believe that this plugin feature really works for your WordPress site.
Using the WP Rocket plugin certainly needs to be applied to the correct settings. This is done to get maximum results to speed up WordPress loading. For this reason, this article will cover in full how to WP Rocket plugin settings on WordPress.
But before that, make sure you have bought it on the official WP Rocket website to get a cheap price and an original plugin.
WP Rocket Plugin Settings in WordPress
To use the WP Rocket plugin and apply its settings, make sure you have installed the WP Rocket plugin on your WordPress. WP Rocket plugin settings we apply to the maximum Rocket WP version 3.3.6.
1. Dashboard Display
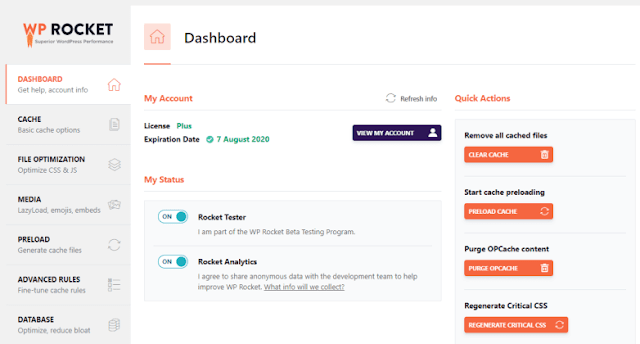
If you have activated the WP Rocket plugin, please open the Settings menu> WP Rocket. You will get a dashboard display like the image below.
On this dashboard page, there are two choices that your bus can activate, namely Rocket Tester and Rocket Analytics. Rocket tester gives you the choice to take part in testing Beta applications or not. Whereas Rocket Analytics gives you the option to share user data with application developers for the purpose of developing the Rocket WP plugin.
2. Cache
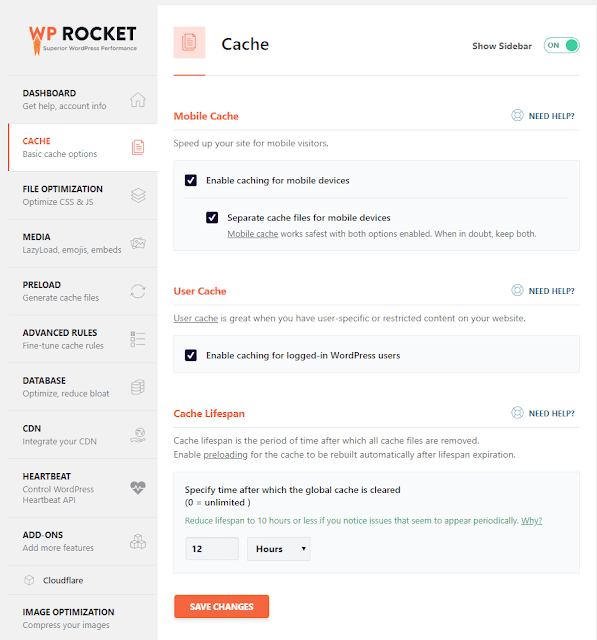
In this section available options to enable Mobile Cache. In my opinion, this is very stable, because now many visitors are accessing the internet using mobile phones. Enabling this option will increase the site loading speed if accessed with a smartphone.
User cache is an option to enable cache if WordPress is accessed by the author. As for Cache Lifespan is how long your cache will be stored before it is deleted. Remember, the higher the lifespan chache number, the bigger the cache file stored on your disk.
3. File Optimization
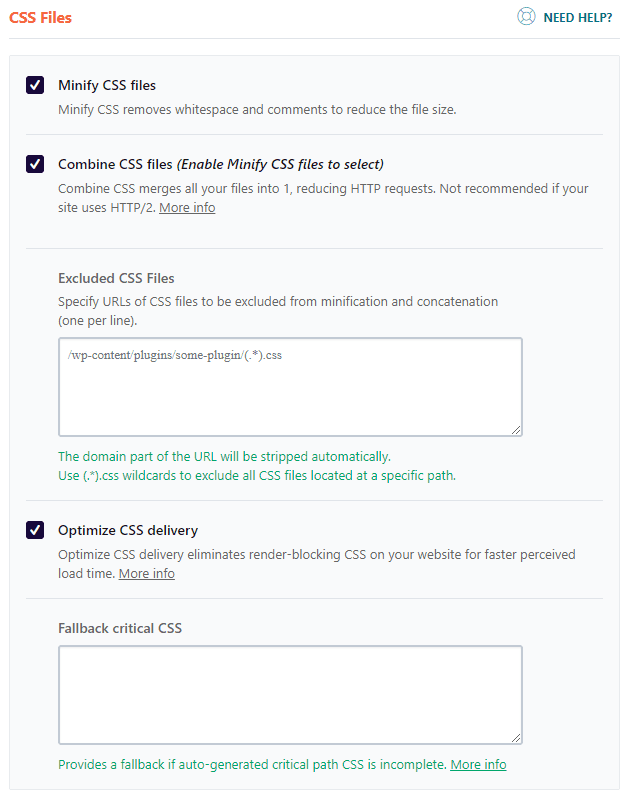
File Optimization will reduce the size of HTML, JavaScript, and CSS files for faster loading.
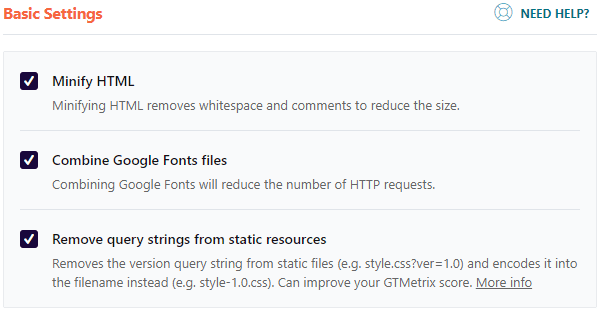
In Basic Settings, there are three options. For maximum results, just turn everything on. Remove Query Strings will increase your score on GTMetrix.
In the CSS Files section, there is the CSS Minify option. Often the site display is chaotic because of this option. You can overcome this by excluding CSS files from being minimized in the Excluded CSS Files column. Also, enable Option Optimize CSS Delivery so that sending CSS files from other servers is faster.
In JavaScript Files, you can minify javascript files. Especially for combining JS Files, you can uncheck it if you already support HTTP / 2. If all settings in this File Optimization section have been applied, click save changes to save the settings.
4. Media
How to set WP Rocket plugin also available media optimization features. You only need to do simple settings like in the picture below.
5. Preload
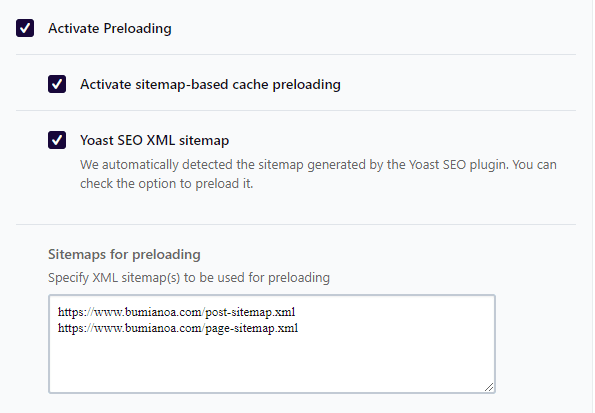
The Preload feature will make the WP Rocket plugin generate a cache of all the links that are on the Homepage and based on your blog's Sitemap. This feature will also generate a new cache when you update new content.
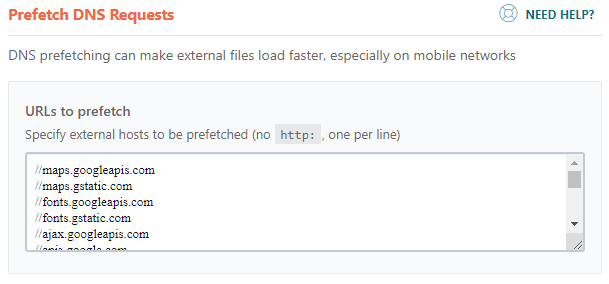
Next in the DNS prefetching section, you need to enter the URL in the URLs to the prefetch column that comes from an external web. The URL in question is the URL that comes from outside your blog but the script is installed and works on your blog. For example font.googlestatic.com, ajax.googleapis.com, etc. The function of this feature allows faster loading times for these files.
You need to enter the URLs of the following files that are used most often:
- //maps.googleapis.com
- //maps.gstatic.com
- //fonts.googleapis.com
- //fonts.gstatic.com
- //ajax.googleapis.com
- //apis.google.com
- //google-analytics.com
- //www.google-analytics.com
- //ssl.google-analytics.com
- //youtube.com
- //api.pinterest.com
- //cdnjs.cloudflare.com
- //pixel.wp.com
- //connect.facebook.net
- //platform.twitter.com
- //syndication.twitter.com
- //platform.instagram.com
- //disqus.com
- //sitename.disqus.com
- //s7.addthis.com
- //platform.linkedin.com
- //w.sharethis.com
- //s0.wp.com
- //s.gravatar.com
- //stats.wp.com
6. Advanced Rules
How to set WP Rocket here we will leave it blank in the Advanced Rules section. This section is only a compliment, but if you are really going to use it, so note the correct application.
In this section options are available:
- Never Cache URL (s)
- Never Cache Cookies
- Never Cache User Agent (s)
- Always Purge URL (s)
- Cache Query String (s)
7. Database
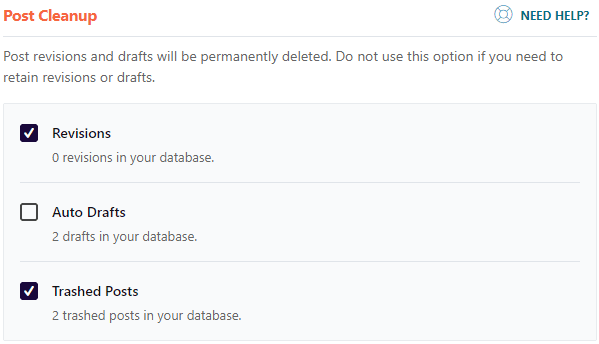
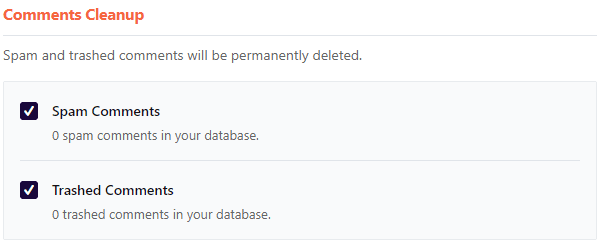
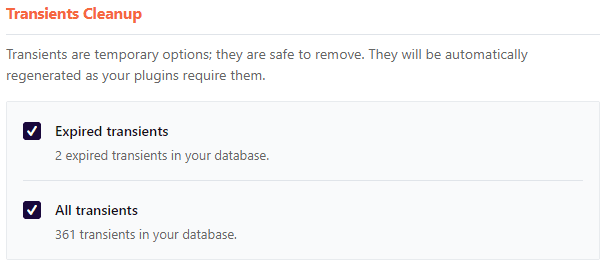
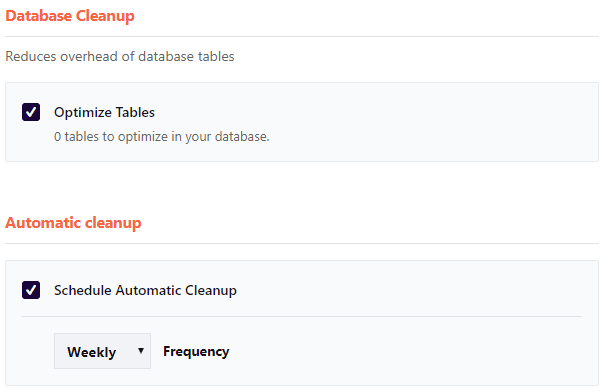
This feature has the same function as the WP-Optimize plugin. This feature serves to clean up trash and optimize your blog database so that it can increase site loading speed and be easier to access.
Make adjustments as shown below.
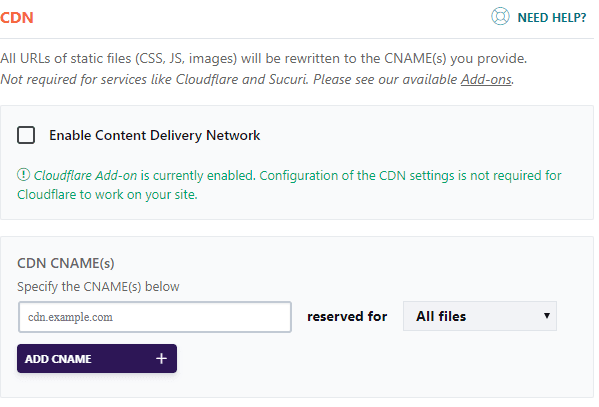
8. CDN (Content Delivery Network)
The CDN feature will significantly increase your site loading access. But if you already use Cloudflare, this feature should not be activated to avoid the appearance of a chaotic blog.
9. Heartbeat
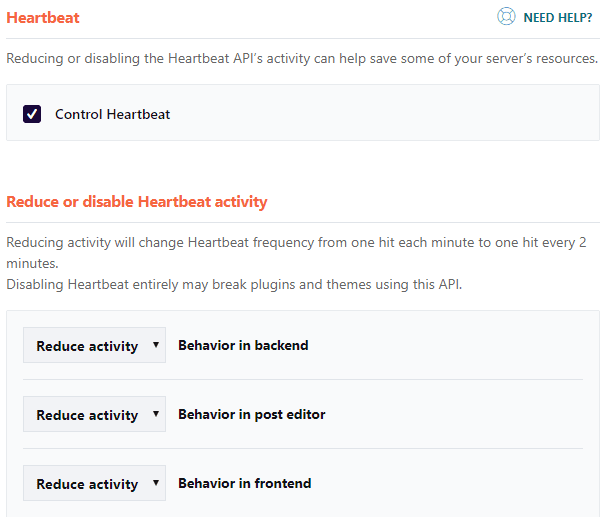
HeartBeat is a service API that serves to provide real-time information and synchronizes data on the server and dashboard display. This feature is very good but in some cases, this feature can increase your CPU usage and slow down your website.
10. Add-ons
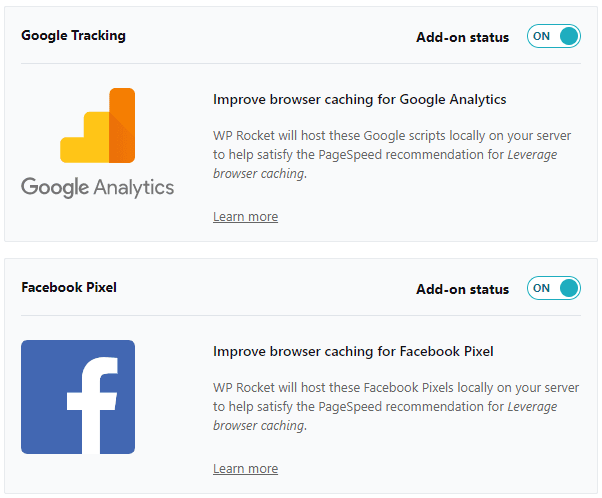
This Add-Ons feature will overcome the tags of external files that have problems in increasing the Leverage Browser Caching. Files that are often problematic such as Google Analytics and Facebook Pixel code. But if the files are installed using Google Tag Manager, then this plugin will not work properly.
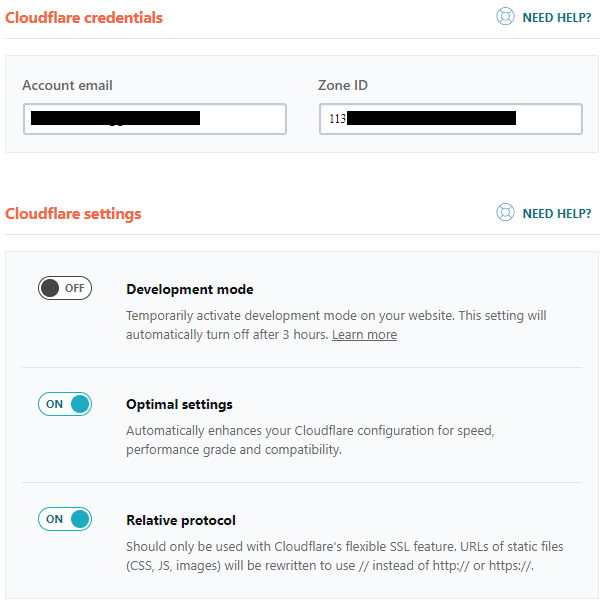
If you use Cloudflare, WP Rocket add-ons also provide synchronize features with Cloudflare. You just need to activate these add ons and make adjustments to Cloudflare credentials as shown below.
11.Image Optimization
WP Rocket Plugin offers an Imagify (paid) plugin for you to use. But I prefer to use WP Smush because it's more simple.
12. Tools
Finally, there are tools for exporting and importing WP Rocket settings. If you have another blog that also uses WP Rocket, all you have to do is export these settings and apply them to other blogs with import.
Rollback feature is also available to overcome errors that occur because of new updates that are not compatible with your WordPress version.
Conclusion :
How to set WP Rocket plugin is very easy. For beginners, you will not experience difficulties in using WP Rocket plugin or in applying the WP Rocket plugin settings. We strongly recommend that you use WP Rocket because it greatly impacts the SEO of your blog.
Tags:
seo




0 Comments